#laravel env file location
Explore tagged Tumblr posts
Visit Tumblr Blog
Explore Tumblr blogs with no restrictions, modern design and the best experience.
Last Seen Tumblr Blogs


Fun Fact
Tumblr has 16.74 million mobile monthly users in the US.
Text
Jobs Portal Nulled Script 4.1

Download the Best Jobs Portal Nulled Script for Free Are you looking for a powerful, customizable, and free job board solution to launch your own employment platform? The Jobs Portal Nulled Script is your ideal solution. This fully-featured Laravel-based job board script offers premium functionality without the high cost. Whether you're building a local job site or a global hiring platform, this nulled script gives you everything you need—completely free. What is the Jobs Portal Nulled Script? The Jobs Portal Nulled Script is a premium Laravel-based job board application designed for businesses, HR agencies, and entrepreneurs who want to build a seamless job posting and recruitment website. The script comes packed with advanced features like employer and candidate dashboards, resume management, email notifications, location-based job search, and more—all without any licensing fees. Why Choose This Nulled Script? Unlike expensive premium plugins or themes, this Jobs Portal Nulled Script offers unmatched value. It provides a user-friendly interface, customizable design, and enterprise-level tools to make recruitment easier for both job seekers and employers. Plus, it's completely free to download from our site, allowing you to save money while building a professional job board. Technical Specifications Framework: Laravel 8+ Database: MySQL 5.7 or higher Language: PHP 7.4+ Responsive Design: Fully mobile-optimized API Ready: RESTful API endpoints available SEO Optimized: Built-in tools for on-page SEO Top Features and Benefits Employer & Candidate Dashboards: Tailored experiences for recruiters and job seekers. Smart Resume Management: Easily manage and filter resumes by job category and skills. Advanced Job Search: Location and keyword-based filtering for accurate results. Email Alerts: Automated job notifications for registered users. Payment Integration: Support for paid job postings with multiple gateways. Multi-language Support: Reach users across the globe effortlessly. Who Can Use This Script? The Jobs Portal Nulled Script is versatile and ideal for: HR agencies wanting a digital recruitment platform. Startups looking to monetize job listings or applications. Universities or colleges offering campus recruitment tools. Freelancers who want to provide job board services to clients. How to Install and Use Installing the Jobs Portal Nulled Script is straightforward: Download the script from our website. Upload the files to your server using FTP or a file manager. Create a MySQL database and import the provided SQL file. Edit the .env file to include your database credentials. Run the Laravel migration and seed commands to set up the tables. Visit yourdomain.com to start configuring your job portal! No technical expertise? No worries. The documentation provided makes it easy even for beginners to set up a complete job board system. FAQs – Frequently Asked Questions Is the Jobs Portal Nulled Script safe to use? Yes, we carefully scan and verify all files to ensure they are free of malware or backdoors. However, always install scripts in a secure environment. Can I customize the script? Absolutely. Since it’s built on Laravel, you have full control to customize routes, models, views, and controllers to fit your unique business model. Does the script support third-party integrations? Yes. You can integrate third-party services like payment gateways, newsletter tools, and analytics platforms with ease. Is it legal to use a nulled script? While we provide the script for educational and testing purposes, always ensure you comply with local software laws and licensing terms if you go live. Recommended Tools for WordPress Users If you're managing your site with WordPress, we recommend using UpdraftPlus Premium nulled for effortless backups and restoration. For search engine optimization, All in One SEO Pack Pro is a must-have tool to help your website rank faster and more effectively.
Take your online recruitment platform to the next level today. Download the Jobs Portal and build a modern, scalable, and highly effective job board without spending a dime!
0 notes
Text
Deploying Laravel Applications to the Cloud
Deploying a Laravel application to the cloud offers several advantages, including scalability, ease of management, and the ability to leverage various cloud-based tools and services. In this guide, we will explore the steps to deploy a Laravel application to the cloud using platforms like AWS, DigitalOcean, and Heroku. We'll also touch on best practices for server configuration, environment variables, and deployment automation.
1. Preparing Your Laravel Application
Before deploying, it’s essential to ensure that your Laravel application is production-ready. Here are some preparatory steps:
Update Dependencies: Run composer install --optimize-autoloader --no-dev to ensure that only production dependencies are installed.
Environment Configuration: Make sure your .env file is configured correctly for the production environment. You’ll need to set up database connections, cache, queue configurations, and any other service keys.
Caching and Optimization: Laravel provides several optimization commands to boost the performance of your application. Run the following commands to optimize your app for production:bashCopy codephp artisan config:cache php artisan route:cache php artisan view:cache
Assets and Front-End Build: If your application uses frontend assets like JavaScript and CSS, run npm run production to compile them and ensure that assets are optimized.
Database Migration: Make sure your database schema is up to date by running:bashCopy codephp artisan migrate --force
2. Choosing a Cloud Platform
There are several cloud platforms that support Laravel applications, including AWS, DigitalOcean, and Heroku. Let's look at how to deploy on each.
A. Deploying Laravel to AWS EC2
AWS (Amazon Web Services) offers a robust infrastructure for hosting Laravel applications. Here's a high-level overview of the steps:
Launch an EC2 Instance: First, you need to create an EC2 instance running a Linux distribution (e.g., Ubuntu). You can choose the instance size based on your traffic and performance needs.
Install PHP and Required Software: Once the instance is up, SSH into it and install PHP, Composer, Nginx (or Apache), and other necessary services:bashCopy codesudo apt update sudo apt install php php-fpm php-mbstring php-xml php-bcmath php-mysql unzip curl sudo apt install nginx
Configure Nginx: Set up Nginx to serve your Laravel app. Create a new Nginx configuration file under /etc/nginx/sites-available/your-app and link it to /etc/nginx/sites-enabled/.Example configuration:nginxCopy codeserver { listen 80; server_name your-domain.com; root /var/www/your-app/public; index index.php index.html index.htm; location / { try_files $uri $uri/ /index.php?$query_string; } location ~ \.php$ { fastcgi_pass unix:/var/run/php/php7.4-fpm.sock; fastcgi_index index.php; fastcgi_param SCRIPT_FILENAME $document_root$fastcgi_script_name; include fastcgi_params; } error_log /var/log/nginx/error.log; access_log /var/log/nginx/access.log; }
Database Configuration: Set up a MySQL or PostgreSQL database (you can use Amazon RDS for a managed database) and configure your .env file with the correct credentials.
SSL and Security: Secure your application with SSL (using Let's Encrypt or AWS Certificate Manager) and ensure your firewall and security groups are configured correctly.
Deploy Code: You can deploy your Laravel application to EC2 using Git, FTP, or tools like Envoyer or Laravel Forge. For Git deployment, clone your repository and configure your environment variables.
B. Deploying Laravel to DigitalOcean
DigitalOcean provides a simple and cost-effective way to host Laravel applications. Here’s how to deploy:
Create a Droplet: Log into your DigitalOcean account and create a new Droplet with a suitable operating system (typically Ubuntu).
Install PHP, Nginx, and Composer: SSH into your droplet and install the necessary dependencies for your Laravel app:bashCopy codesudo apt update sudo apt install php php-fpm php-mbstring php-xml php-bcmath php-mysql unzip curl sudo apt install nginx
Configure Nginx and Laravel Application: Configure Nginx to point to your Laravel application’s public folder and set up SSL.
Database Configuration: Set up MySQL or PostgreSQL on your droplet, then configure the .env file for your database credentials.
Deploying the Code: You can either deploy your code via Git or use an automation tool like Envoyer to streamline deployments. You’ll also need to configure file permissions for storage and cache directories.
C. Deploying Laravel to Heroku
Heroku is an excellent choice for quick and easy Laravel application deployment with minimal configuration. Here’s how you can deploy a Laravel app on Heroku:
Create a Heroku App: Sign up or log into your Heroku account and create a new app. This will automatically provision a server for you.
Install Heroku CLI: Install the Heroku CLI on your local machine if you haven't already:bashCopy codecurl https://cli-assets.heroku.com/install.sh | sh
Configure the .env File for Heroku: Heroku uses environment variables, so make sure you configure your .env file correctly or set them directly in the Heroku dashboard.
Deploy the Code: Push your code to Heroku using Git:bashCopy codegit push heroku master
Database Configuration: Heroku offers a managed PostgreSQL database that you can provision with the command:bashCopy codeheroku addons:create heroku-postgresql:hobby-dev
Run Migrations: Run database migrations on Heroku with:bashCopy codeheroku run php artisan migrate
3. Automating Deployment with Laravel Forge or Envoyer
For smoother deployment management, you can use tools like Laravel Forge or Envoyer.
Laravel Forge: Laravel Forge is a server management and deployment service designed for PHP applications. It automates tasks like server provisioning, security updates, and Laravel deployments to platforms like AWS, DigitalOcean, and others.
Envoyer: Envoyer is a zero-downtime deployment tool that ensures your Laravel app is deployed with no interruption to your users. It handles the deployment process seamlessly, ensuring the application is running smoothly at all times.
4. Conclusion
Deploying a Laravel application to the cloud can seem daunting, but it becomes easier with tools and services that automate much of the process. Whether you choose AWS, DigitalOcean, or Heroku, each platform offers unique benefits for hosting your Laravel application. Using automation tools like Forge and Envoyer, you can further streamline the deployment process, ensuring your app runs smoothly and efficiently in the cloud.
0 notes
Text

How to Create a Website Using a Programming Language Like Laravel with a Pre-Built Theme on VS Code - Sohojware
Creating a website using Laravel, a powerful PHP framework, can be an excellent choice for developers seeking flexibility and efficiency. When combined with a pre-built theme, the process becomes even more streamlined, allowing you to focus on customization and functionality rather than starting from scratch. In this article, we’ll guide you through setting up a website using Laravel, leveraging a pre-built theme, and coding with Visual Studio Code (VS Code). Whether you are a seasoned developer or just starting, this guide from Sohojware will help you create a stunning website.
Why Choose Laravel for Your Website?
Laravel stands out as one of the most popular PHP frameworks due to its elegant syntax, robust features, and ease of use. It provides a clean and straightforward way to build web applications, making it a favorite among developers. Here’s why Laravel is an excellent choice:
Eloquent ORM: Laravel’s Eloquent ORM allows for seamless database interaction using an object-oriented approach.
Blade Templating Engine: Laravel’s Blade template engine makes it easy to create dynamic content and layouts.
Artisan CLI: Laravel’s command-line tool, Artisan, simplifies repetitive tasks and enhances productivity.
Security: Laravel offers built-in security features to protect your website from common vulnerabilities.
Scalability: Laravel is designed to handle large-scale applications, ensuring that your website can grow with your business.
Getting Started with Laravel and VS Code
Step 1: Install Laravel
To begin, you need to have PHP and Composer installed on your machine. Composer is a dependency manager for PHP, essential for installing Laravel and its components.
Install Composer: Download Composer from getcomposer.org and follow the installation instructions for your operating system.
Install Laravel: Open your terminal and run the following command to install Laravel globally:
Step 2: Create a New Laravel Project


Step 3: Set Up Your Development Environment
Open VS Code: Launch Visual Studio Code, and open your newly created Laravel project directory.
Configure Your Environment: Edit the .env file in your project root to configure your database and other environment settings. For instance:
Step 4: Install and Configure a Pre-Built Theme
Select a Pre-Built Theme: Choose a pre-built theme that suits your website’s needs. Websites like ThemeForest or Creative Market offer a range of Laravel-compatible themes.
Integrate the Theme with Laravel:
Step 5: Customize Your Theme
Edit Blade Templates: Use VS Code to modify the Blade templates according to your needs. Blade templates are located in the resources/views directory. For example, you might customize the layouts/app.blade.php file to include your theme’s layout.
Adjust Styles and Scripts: Ensure that the theme’s CSS and JavaScript files are included in your Blade templates. You may need to adjust paths to ensure that assets are correctly loaded.
Step 6: Develop Your Website
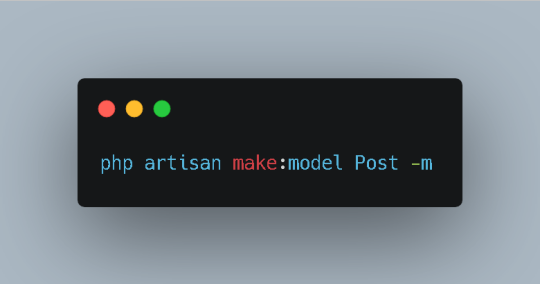
Create Models and Controllers: Use Laravel’s Artisan CLI to generate models and controllers. For instance:
The -m flag generates a migration file for the model.

Step 7: Test and Launch Your Website
Run the Development Server: Start Laravel’s built-in server:
Visit http://localhost:8000 to preview your website.
Debug and Fix Issues: Use Laravel’s debugging tools to identify and fix any issues.
Deploy Your Website: Once your website is ready, deploy it to a production server. Update your .env file for production settings and use a hosting provider like DigitalOcean or Laravel Forge to deploy your site.
FAQs About Using Laravel with Sohojware
1. What is Sohojware, and how can they assist with my Laravel project?
Sohojware is a company specializing in web development and technology solutions. They offer services for creating and optimizing Laravel-based websites, including custom theme integration and performance enhancements. For more information, visit Sohojware.
2. Can Sohojware help me with Laravel theme customization?
Yes, Sohojware can assist with customizing Laravel themes to match your specific requirements. Their team of experts will ensure that your website’s design aligns with your brand and functionality needs.
3. How do I get started with Laravel development at Sohojware?
To start a Laravel project with Sohojware, contact their team through their website. They offer consultations and development services tailored to your project needs. Visit Sohojware for more details.
4. Does Sohojware offer support for Laravel deployment?
Absolutely. Sohojware provides comprehensive support for deploying Laravel applications. Their services include server setup, environment configuration, and ongoing maintenance. Learn more by visiting Sohojware.
5. What resources does Sohojware provide for learning Laravel?
Sohojware offers various resources and tutorials for learning Laravel. Their website features blog posts, guides, and case studies to help you understand Laravel better and apply best practices in your projects.
By following these steps and leveraging the expertise of Sohojware, you can create a professional and functional website using Laravel and a pre-built theme. Whether you are building a personal blog, an e-commerce site, or a corporate portal, Laravel’s powerful features combined with a pre-built theme can help you achieve your goals efficiently. For more information and support, visit Sohojware today.
1 note
·
View note
Photo
Deploy laravel project with docker swarm We check three major step in this guide Setup laravel project with docker compose Deploy the stack to the swarm Create gitlab-ci Setup laravel project with docker compose we will explore the process of deploying a laravel project using docker swarm and setting up a CI/CD pipline to automate the deployment process. Now let’s start with containerize a laravel project with docker compose we need three separate service containers: An app service running PHP7.4-FPM; A db service running MySQL 5.7; An nginx service that uses the app service to parse PHP code Step 1. Set a env variable in project In root directory of project we have .env file now we need to update some variable DB_CONNECTION=mysql DB_HOST=db DB_PORT=3306 DB_DATABASE=experience DB_USERNAME=experience_user DB_PASSWORD=your-password Step 2. Setting up the application’s Docekrfile we need to build a custom image for the application container. We’ll create a new Dockerfile for that. Docker file FROM php:7.4-fpm # Install system dependencies RUN apt-get update && apt-get install -y \ git \ curl \ libpng-dev \ libonig-dev \ libxml2-dev \ zip \ unzip # Clear cache RUN apt-get clean && rm -rf /var/lib/apt/lists/* # Install PHP extensions RUN docker-php-ext-install pdo_mysql mbstring exif pcntl bcmath gd # Get latest Composer COPY --from=composer:latest /usr/bin/composer /usr/bin/composer # Set working directory WORKDIR /var/www Step 3. Setting up Nginx config and Database dump file In root directory create a new directory called docker-compose Now we need two other directories, a nginx directory and mysql directory So we have this two route in our project laravel-project/docker-compose/nginx/ laravel-project/docker-compose/mysql/ In nginx directory create a file called experience.conf we write nginx config in this file like: server { listen 80; index index.php index.html; error_log /var/log/nginx/error.log; access_log /var/log/nginx/access.log; root /var/www/public; location ~ \.php$ { try_files $uri =404; fastcgi_split_path_info ^(.+\.php)(/.+)$; fastcgi_pass app:9000; fastcgi_index index.php; include fastcgi_params; fastcgi_param SCRIPT_FILENAME $document_root$fastcgi_script_name; fastcgi_param PATH_INFO $fastcgi_path_info; } location / { try_files $uri $uri/ /index.php?$query_string; gzip_static on; } } In mysql directory create a file called init_db.init we write mysql initialization in this file like: DROP TABLE IF EXISTS `places`; CREATE TABLE `places` ( `id` bigint(20) unsigned NOT NULL AUTO_INCREMENT, `name` varchar(255) COLLATE utf8mb4_unicode_ci NOT NULL, `visited` tinyint(1) NOT NULL DEFAULT '0', PRIMARY KEY (`id`) ) ENGINE=InnoDB AUTO_INCREMENT=12 DEFAULT CHARSET=utf8mb4 COLLATE=utf8mb4_unicode_ci; INSERT INTO `places` (name, visited) VALUES ('Berlin',0),('Budapest',0),('Cincinnati',1),('Denver',0),('Helsinki',0),('Lisbon',0),('Moscow',1); Step 4. Creating a multi container with docker-compose We need a building three container that should share networks and data volumes. Ok so create a docker-compose file in root directory of project For craete a network for connecting services we define network in docker-compose file like this: networks: experience: driver: bridge App service: app: build: context: ./ dockerfile: Dockerfile image: travellist container_name: experience-app restart: unless-stopped working_dir: /var/www/ volumes: - ./:/var/www networks: - experience DB service: db: image: mysql:8.0 container_name: experience-db restart: unless-stopped environment: MYSQL_DATABASE: ${DB_DATABASE} MYSQL_ROOT_PASSWORD: ${DB_PASSWORD} MYSQL_PASSWORD: ${DB_PASSWORD} MYSQL_USER: ${DB_USERNAME} SERVICE_TAGS: dev SERVICE_NAME: mysql volumes: - ./docker-compose/mysql:/docker-entrypoint-initdb.d networks: - experience Nginx service: nginx: image: nginx:1.17-alpine container_name: experience-nginx restart: unless-stopped ports: - 8000:80 volumes: - ./:/var/www - ./docker-compose/nginx:/etc/nginx/conf.d networks: - experience So our docker-compose file be like this: version: "3.7" services: app: build: context: ./ dockerfile: Dockerfile image: travellist container_name: experience-app restart: unless-stopped working_dir: /var/www/ volumes: - ./:/var/www networks: - experience db: image: mysql:8.0 container_name: experience-db restart: unless-stopped environment: MYSQL_DATABASE: ${DB_DATABASE} MYSQL_ROOT_PASSWORD: ${DB_PASSWORD} MYSQL_PASSWORD: ${DB_PASSWORD} MYSQL_USER: ${DB_USERNAME} SERVICE_TAGS: dev SERVICE_NAME: mysql volumes: - ./docker-compose/mysql:/docker-entrypoint-initdb.d networks: - experience nginx: image: nginx:alpine container_name: experience-nginx restart: unless-stopped ports: - 8100:80 volumes: - ./:/var/www - ./docker-compose/nginx:/etc/nginx/conf.d/ networks: - experience networks: experience: driver: bridge Step 5. Running application with docker compose Now we can build the app image with this command: $ docker-compose build app When the build is finished, we can run the environment in background mode with: $ docker-compose up -d Output: Creating exprience-db ... done Creating exprience-app ... done Creating exprience-nginx ... done to show information about the state of your active services, run: $ docker-compose ps Well in these 5 simple steps, we have successfully ran our application. Now we have a docker-compose file for our application that needs for using in docker swarm. Let’s start Initialize docker swarm. After installing docker in your server *attention: To install Docker, be sure to use the official documentation install docker check docker information with this command: $ docker info You should see “swarm : inactive” in output For activate swarm in docker use this command: $ docker swarm init The docker engine targeted by this command becomes a manager in the newly created single-node swarm. What we want to use is the services of this docker swarm. We want to update our service like app with docker swarm, The advantage of updating our service in Docker Swarm is that there is no need to down the app service first, update the service, and then bring the service up. In this method, with one command, we can give the image related to the service to Docker and give the update command. Docker raises the new service without down the old service and slowly transfers the load from the old service to the new service. When running Docker Engine in swarm mode, we can use docker stack deploy to deploy a complete application stack to the swarm. The deploy command accepts a stack description in the form of a Compose file. So we down our docker compose with this command: $ docker-compose down And create our stack. ok if everything is ok until now take a rest Deploy the stack to the swarm $ docker stack deploy --compose-file docker-compose.yml For example : $ docker stack deploy --compose-file docker-compose.yml staging Probably you see this in output: Creating network staging_exprience Creating service staging_nginx failed to create service staging_nginx: Error response from daemon: The network staging_exprience cannot be used with services. Only networks scoped to the swarm can be used, such as those created with the overlay driver. This is because of “driver: bridge” for deploying your service in swarm mode you must use overlay driver for network if you remove this line in your docker compose file When the stack is being deployed this network will be create on overlay driver automatically. So our docker-compose file in network section be like this: networks: experience: And run upper command: $ docker stack deploy --compose-file docker-compose.yml staging For now you probably you see this error : failed to create service staging_nginx: Error response from daemon: The network staging_experience cannot be used with services. Only networks scoped to the swarm can be used, such as those created with the overlay driver. Get network list in your docker: $ docker network ls Output: NETWORK ID NAME DRIVER SCOPE 30f94ae1c94d staging_experience bridge local So your network has local scope yet because in first time deploy stack this network save in local scope and we must remove that by: $ docker network rm staging_experience After all this run command: $ docker stack deploy --compose-file docker-compose.yml staging Output: Creating network staging_experience Creating service staging_app Creating service staging_db Creating service staging_nginx Now get check stack by: $ docker stack ls Output: NAME SERVICES staging 3 And get service list by: $ docker service ls Output: If your REPLICAS is 0/1 something wrong is your service For checking service status run this command: $ docker service ps staging_app for example And for check detail of service run this command: $ docker service logs staging_app for example Output of this command show you what is problem of your service. And for updating your a service with an image the command you need is this: $ docker service update --image "<your-image>" "<name-of-your-service>" --force That's it your docker swarm is ready for zero down time deployment :))) Last step for have a complete process zero down time deployment is create pipeline in gitlab. Create gitlab-ci In this step we want create a pipeline in gitlab for build, test and deploy a project So we have three stage: stages: - Build - Test - Deploy Ok let’s clear what we need and what is going on in this step . We want update laravel project and push our change in gitlab create a new image of this changes and test that and after that log in to host server pull that updated image in server, and update service of project. For login to server we need define some variable in gitlab in your repository goto setting->CI/CD->VARIABLES Add variable Add this variables: CI_REGISTRY : https://registry.gitlab.com DOCKER_AUTH_CONFIG: { "auths": { "registry.gitlab.com": { "auth": "<auth-key>" } } } auth-key is base64 hash of “gitlab-username:gitlab-password” SSH_KNOWN_HOSTS: Like 192.168.1.1 ssh-rsa AAAAB3NzaC1yc2EAAAADAQABAAABgQCGUCqCK3hNl+4TIbh3+Af3np+v91AyW4+BxXRtHBC2Y/uPJXF2jdR6IHlSS/0RFR3hOY+8+5a/r8O1O9qTPgxG8BSIm9omb8YxF2c4Sz/USPDK3ld2oQxbBg5qdhRN28EvRbtN66W3vgYIRlYlpNyJA+b3HQ/uJ+t3UxP1VjAsKbrBRFBth845RskSr1V7IirMiOh7oKGdEfXwlOENxOI7cDytxVR7h3/bVdJdxmjFqagrJqBuYm30 You can see how generate ssh key in this post: generate sshkey SSH_PRIVATE_KEY: SSH_REMOTE_HOST: root@ This is your variables in gitlab. So let’s back to gitlab-ci In root directory of project create a new file .gitlab-ci.yml and set build stage set test stage And in the last set deploy stage like: stages: - Build - Test - Deploy variables: IMAGE_TAG: $CI_REGISTRY_IMAGE:$CI_COMMIT_REF_SLUG-$CI_COMMIT_SHORT_SHA build: stage: Build image: docker:20.10.16 services: - docker:dind script: - docker login -u $CI_REGISTRY_USER -p $CI_REGISTRY_PASSWORD $CI_REGISTRY - docker build --pull -f Dockerfile -t $IMAGE_TAG . - docker push $IMAGE_TAG preparation: stage: Test image: $IMAGE_TAG needs: - build script: - composer install artifacts: expire_in: 1 day paths: - ./vendor cache: key: ${CI_COMMIT_REF_SLUG}-composer paths: - ./vendor unit-test: stage: Test image: $IMAGE_TAG services: - name: mysql:8 alias: mysql-test needs: - preparation variables: APP_KEY: ${APP_KEY} MYSQL_ROOT_PASSWORD: ${MYSQL_ROOT_PASSWORD} MYSQL_DATABASE: ${MYSQL_DATABASE} DB_HOST: ${DB_HOST} DB_USERNAME: ${DB_USERNAME} DB_PASSWORD: ${DB_PASSWORD} script: - php vendor/bin/phpunit staging-deploy: stage: Deploy extends: - .deploy-script variables: APP: "stackdemo_app" STACK: "travellist-staging" only: - develop needs: - unit-test environment: name: stage .remote-docker: variables: DOCKER_HOST: ssh://${SSH_REMOTE_HOST} image: docker:20.10.16 before_script: - eval $(ssh-agent -s) - echo $IMAGE_TAG - echo "$SSH_PRIVATE_KEY" | tr -d '\r' | ssh-add - - mkdir -p ~/.ssh - chmod 700 ~/.ssh - echo "HOST *" > ~/.ssh/config - echo "StrictHostKeyChecking no" >> ~/.ssh/config - echo -n $CI_REGISTRY_PASSWORD | docker login -u $CI_REGISTRY_USER --password-stdin $CI_REGISTRY .deploy-script: extends: - .remote-docker script: - cp $develop_config /root/project/core - docker pull $IMAGE_TAG - docker service update --image "$IMAGE_TAG" "$APP" --force dependencies: [] Change something in your project and push to gitlab and wait for it To see all pipeline pass like this : And this is beautiful. https://dev.to/holyfalcon/deploy-laravel-project-with-docker-swarm-5oi
0 notes
Text
My Own Blog by Laravel(1)
Make my own blog with Laravel!!
Hi guys, I will make my own blog by Laravel. I'm a Japanese cook in BC. But I don't work now because of COVID-19. So I have much time now. That's why I have started to learn Laravel. I'm not a good English writer. But I will do my best in English. Please correct my English if you would notice any wrong expressions. Thank you!
Anyway, I will post about making a blog by Laravel for a while. Let's get started!
All we have to do
Install Laravel
Create a Project
Database Setting
Migration
Create Models
Seeding
Routing
Make Controllers
Make Views
Agenda
Today's agenda is
Install Laravel
Create a Project
Database Setting
Migration
Create Models
Seeding
Install Laravel
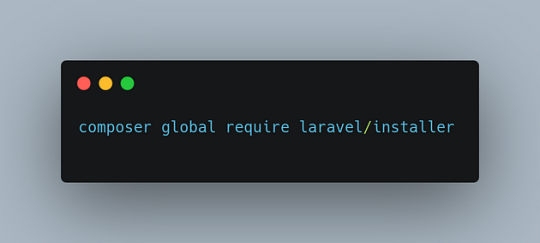
Laravel utilizes Composer to manage its dependencies. So install Composer first if you have not installed Composer yet. Ok, now you can install Laravel using Composer.
% composer global require Laravel/installer
Here we go. So next step is to create a project named blog!
Create a project
Creating a project in Laravel is super easy. Just type a command like below.
% laravel new blog
That's it. So easy. That command bring every dependencies automatically. And you move to blog directory.
% cd blog
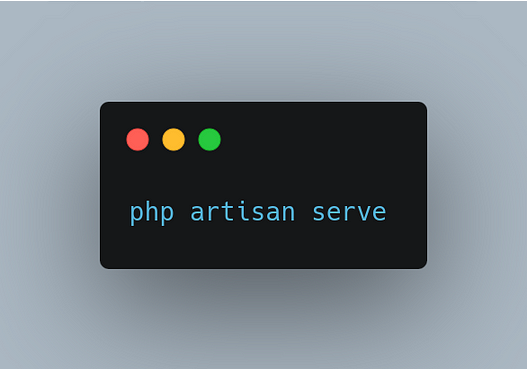
Now you can use a new command called 'artisan'. It's a command used for Laravel. For example, you can start server with this command.
% php artisan serve
Do you see command line like this?
% php artisan serve ~/workspace/blog Laravel development server started: http://127.0.0.1:8000 [Mon Apr 20 09:20:56 2020] PHP 7.4.5 Development Server (http://127.0.0.1:8000) started
You can access localhost:8000 to see the Laravel's welcome page! If you want to know the other arguments of artisan, just type like this.
% php artisan list
Then you can see all artisan commands. You can also display the commands for a specific namespace like this.
% php artisan list dusk ~/workspace/blog Laravel Framework 7.6.2 Usage: command [options] [arguments] Options: -h, --help Display this help message -q, --quiet Do not output any message -V, --version Display this application version --ansi Force ANSI output --no-ansi Disable ANSI output -n, --no-interaction Do not ask any interactive question --env[=ENV] The environment the command should run under -v|vv|vvv, --verbose Increase the verbosity of messages: 1 for normal output, 2 for more verbose output and 3 for debug Available commands for the "dusk" namespace: dusk:chrome-driver Install the ChromeDriver binary dusk:component Create a new Dusk component class dusk:fails Run the failing Dusk tests from the last run and stop on failure dusk:install Install Dusk into the application dusk:make Create a new Dusk test class dusk:page Create a new Dusk page class
So let's go to next step!
Database setting
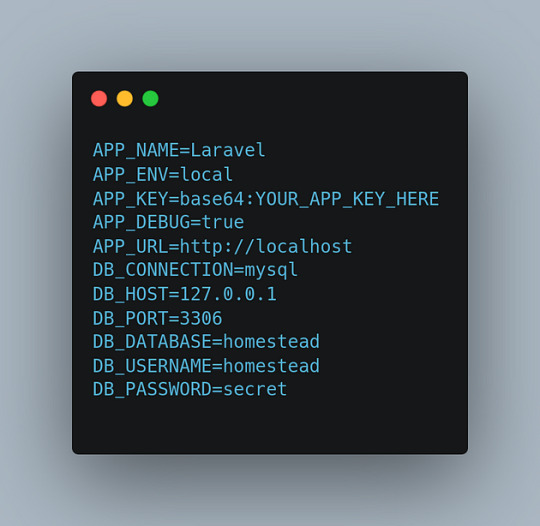
Open .env located under root directory. And edit around DB setting.
DB_CONNECTION=mysql DB_HOST=127.0.0.1 DB_PORT=3306 DB_DATABASE=blog DB_USERNAME=root DB_PASSWORD=
Depends on your database. I use MySQL and I already create database named blog in MySQL. You should create user for only this project when you deploy.
Migration
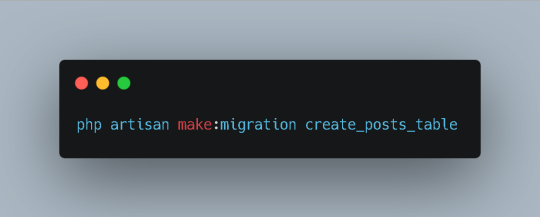
Laravel supplies the migration system. It allow you to control database using php code. For example, when you want to create database, type the command like this.
% php artisan make:migration create_posts_table
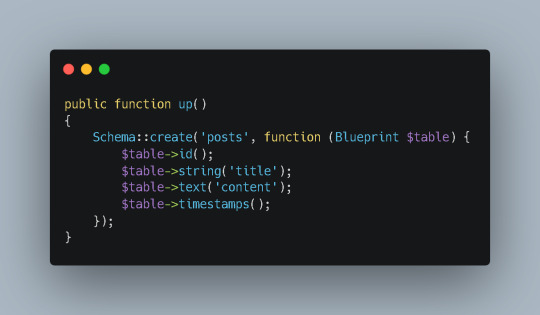
You can see a new migration file database/migrations/xxxx_xx_xx_xxxxxx_create_posts_table.php. Write down columns you need in the function called up() and write down columns you want to delete in down(). Edit it.
public function up() { Schema::create('posts', function (Blueprint $table) { $table->increments('id'); $table->boolean('published'); $table->string('title'); $table->longText('body'); $table->string('tag')->nullable(); $table->timestamps(); }); }
It's ready! Execute this command.
% php artisan migrate
Here we go! Now you got some tables with columns! Let's check them out in MySQL console.
% mysql -uroot
And check tables and columns.
mysql> use blog; Reading table information for completion of table and column names You can turn off this feature to get a quicker startup with -A Database changed mysql> show tables; +----------------+ | Tables_in_blog | +----------------+ | failed_jobs | | migrations | | posts | | users | +----------------+ 4 rows in set (0.01 sec) mysql> desc posts; +------------+------------------+------+-----+---------+----------------+ | Field | Type | Null | Key | Default | Extra | +------------+------------------+------+-----+---------+----------------+ | id | int(10) unsigned | NO | PRI | NULL | auto_increment | | published | tinyint(1) | NO | | NULL | | | title | varchar(191) | NO | | NULL | | | body | longtext | NO | | NULL | | | tag | varchar(191) | YES | | NULL | | | created_at | timestamp | YES | | NULL | | | updated_at | timestamp | YES | | NULL | | | user_id | int(11) | NO | MUL | NULL | | +------------+------------------+------+-----+---------+----------------+ 8 rows in set (0.01 sec)
Good! You could create tables and columns by php. Next step is Create Model.
Create Model
Laravel Framework is MVC application model. MVC is Model, View and Controller. Application works with each role. View works for display to browsers. Controller works as a playmaker. It receives request from router and access databases to get some datas and pass the datas to views. Model connects to the database and gets, inserts, updates or deletes datas.
Now you create a Model.
% php artisan make:model Post
Then you will see the new Post model under app/Post.php.
<?php namespace App; use Illuminate\Database\Eloquent\Model; class Post extends Model { // }
This model has no code. But it's ok. You can leave it for now.
About a model name
A model name is important. A model connects to table of the database with the rule of the name. If you have a posts table, Post model is mapped with posts table automatically.
Seeding
Seeding is very useful function for preparing test datas or master datas. You can use it easily. All you need is just 1. making seeder file and 2. executing it. Let's do that.
Making seeder files
% php artisan make:seeder BooksTableSeeder Seeder created successfully.
Edit seeder files
public function run() { DB::table('posts')->truncate(); $posts = [ [ 'published' => true, 'title' => 'The First Post', 'body' => '1st Lorem ipsum...', 'tag' => 'laravel', 'user_id' => 1 ], [ 'published' => true, 'title' => 'The Second Post', 'body' => '2nd Lorem ipsum dolor sit amet...', 'tag' => 'shiba-inu', 'user_id' => 1 ], [ 'published' => false, 'title' => 'The Third Post', 'body' => '3rd Lorem ipsum dolor sit ...', 'tag' => 'laravel', 'user_id' => 1 ] ]; foreach($posts as $post) { \App\Post::create($post); } }
And edit DatabaseSeeder.php file.
public function run() { // $this->call(UserSeeder::class); $this->call(PostsTableSeeder::class); }
Execute seegding
% php artisan db:seed Seeding: PostsTableSeeder Database seeding completed successfully.
Sweet. Let's check out database.
mysql> select * from posts; +----+-----------+-----------------+-----------------------------------+---------------------------------+---------------------+---------+ | id | published | title | body | tag | created_at | updated_at | user_id | +----+-----------+-----------------+-----------------------------------+-----------+---------------------+---------------------+---------+ | 1 | 1 | The First Post | 1st Lorem ipsum... | laravel | 2020-04-19 19:16:18 | 2020-04-19 19:16:18 | 1 | | 2 | 1 | The Second Post | 2nd Lorem ipsum dolor sit amet... | shiba-inu | 2020-04-19 19:16:18 | 2020-04-19 19:16:18 | 1 | | 3 | 0 | The Third Post | 3rd Lorem ipsum dolor sit ... | laravel | 2020-04-19 19:16:18 | 2020-04-19 19:16:18 | 1 | +----+-----------+-----------------+-----------------------------------+-----------+---------------------+---------------------+---------+ 3 rows in set (0.00 sec)
Perfect! Now we can go next step!
So, see you next time!
References
Installation - Laravel - The PHP Framework For Web Artisans
1 note
·
View note
Text
Laravel Beginner tutorial | Why env file and DB Connections - Laravel
Laravel Beginner tutorial | Why env file and DB Connections – Laravel
Laravel Beginner tutorial | Why env file and DB Connections – Laravel
[ad_1]
Why there is .env file in laravel and how to setup database connection with laravel. Laravel Beginner tutorial – from download to deploy
Check https://bitfumes.com For ads free and more advanced courses
Join Our Slack Community – https://goo.gl/pqCjZH
==================FOLLOW ME ==================
View On WordPress
#.env file laravel#laravel .env example#laravel .env file#laravel .env mysql#laravel 2019 the complete guide with real world projects#laravel 2019 tutorial#laravel 5.8 tutorial#laravel database connection#laravel database connection file#laravel database connection tutorial#laravel database migration tutorial#laravel env file hide#laravel env file in production#laravel env file location#learn laravel step by step#what is laravel#what is laravel framework in php
0 notes
Text
Empowering Laravel API Creation: Kickstart Your Success Today With No. 1 Tutorial!

What is Laravel API? Laravel is a popular open-source PHP web application framework. It offers an easy way to develop web applications and provides a wide range of features such as routing, session management, authentication and caching. The most interesting feature of Laravel is its ability to create an API (Application Programming Interface). An API allows developers to create applications that interact with other systems or services. The Laravel API provides an easy way to create secure APIs for your project that other systems or devices can easily consume. It includes authentication, authorization and data validation tools, so you don't have to worry about writing code for these tasks. The Laravel API also has built-in support for creating RESTful APIs, which makes it faster and easier to develop APIs without having to write complicated code from scratch. Finally, the Laravel API contains a package suite that allows developers to quickly add functionality such as messaging, payment processing and image handling into their projects. Setting up the Environment Setting up the environment for a Laravel API is easy. Firstly, you need to install the latest version of PHP and either Apache or Nginx web server. Once those are installed, you can download and install Composer - the tool that allows us to manage our dependencies. After that, it's just a matter of running the commands from Composer to create a new Laravel project with all its dependencies set up correctly. To configure your environment further, you can create a .env file containing environment variables used by your application code. Lastly, you should configure your web server, so it knows how to serve files generated by your Laravel application. Authentication & Authorization Authentication is the process of verifying a user's identity to determine that they are who they say they are. On the other hand, authorization is the process of authorizing a user's access rights to certain resources or data according to their identity. Together, authentication and authorization provide the security necessary for an API-driven application. Laravel provides its authentication mechanism, which makes it easy to secure your API endpoints with simple user registration and login features. The Laravel framework can also be used for authorization by access control mechanisms like roles and permissions that authorize users based on their role or permission level. Additionally, Laravel can be used for two-factor authentication (2FA) and social media OAuth integration for added security measures. These security protocols ensure that only authorized users can access your API's data and resources. Configuring Routes Routes are essential for configuring your Laravel application to work correctly. When setting up routes, you must specify the type of request that will be handled, the URI of the request, and which action should take place in response. You can also specify middleware on a route-by-route basis to protect your application from potential security threats. Routes can be defined in the web.php or api.php files located in the routes directory within your Laravel project directory. When configuring routes for an API, you must use a combination of HTTP verbs and URI segments to define each route's action. Commonly used verbs include GET (to retrieve data), POST (to create new data), PUT/PATCH (to update existing data), and DELETE (to delete existing data). You may also need to define parameters with specific values that may be passed into a controller method when handling an incoming request. This allows your application to respond differently depending on which parameter is set by the client making the request. Working With Database Database management is an essential part of working with Laravel. It provides a unified interface for managing databases and running queries directly from the application code. The Eloquent ORM in Laravel makes it easy to access and manipulate data stored in the database. To use Eloquent, you need to define your database schema using migrations. Migrations allow you to easily create, modify, and delete tables, fields, indexes and other components that make up your database structure. After defining the database structure, you can use Eloquent's active record implementation to interact with the database without having to write any SQL statements yourself. You can also write raw SQL queries using Laravel's Query Builder or DB facade class if needed. Working with databases in Laravel is simple and efficient thanks to these tools and features that make it easier for developers of all experience levels to leverage its powerful capabilities.

Testing & Debugging Testing and debugging are essential steps for developing a Laravel API. To ensure that the code meets all requirements, it's important to test out the functionality of the API before deploying it to production. Testing should be done at every stage of development, from initial unit tests to integration tests and end-to-end testing. Debugging is also important in developing a Laravel API, as errors may occur due to incorrect configurations or unforeseen interactions between components. Various tools like xdebug can be used to debug and identify the root cause of issues quickly. Lastly, performance testing should be addressed as it helps determine how well your system performs under certain load levels and enables you to optimize accordingly.
Conclusion: Get Started with Laravel API!
Once you have learned how to create an API using Laravel, it is time to get started. To begin, you will need a web server and a database server. You can use Apache for your web server and MySQL for your database server. Next, install Composer on your computer, a dependency manager for PHP packages that will help you install Laravel. Finally, install Laravel by running the command "composer create-project --prefer-dist laravel/laravel". After installation, you are ready to start building your API in Laravel! You can create an API controller in a few simple steps: - Add routes to routes/api.php file. - Define methods in the controller class. - Use model classes as needed. - Return data in JSON format from each endpoint (route). Additionally, authentication should be implemented when necessary and pagination if returning large sets of data. By following these simple steps, you are well on your way toward creating a fully functioning API that uses Laravel! What is Laravel API? Laravel API is a feature in the Laravel web application framework that allows developers to create secure APIs for their projects that can be consumed by other systems or devices. What are the benefits of using Laravel API? Using Laravel API can make it easier and faster to develop APIs without having to write complicated code from scratch. It includes authentication, authorization, and data validation tools to ensure the security of your APIs. Laravel API also has built-in support for creating RESTful APIs and a package suite that allows developers to quickly add functionality to their projects. How do I set up the environment for a Laravel API? To set up the environment for a Laravel API, you need to install the latest version of PHP and either Apache or Nginx web server. Then, you can download and install Composer, the tool that allows us to manage our dependencies. After that, it's just a matter of running the commands from Composer to create a new Laravel project with all its dependencies set up correctly. How does authentication and authorization work in Laravel API? Authentication and authorization are essential security protocols that ensure only authorized users can access your API's data and resources. Laravel provides its authentication mechanism, which makes it easy to secure your API endpoints with simple user registration and login features. Additionally, Laravel can be used for authorization by access control mechanisms like roles and permissions that authorize users based on their role or permission level. How do I configure routes for my Laravel API? When configuring routes for a Laravel API, you must use a combination of HTTP verbs and URI segments to define each route's action. Commonly used verbs include GET (to retrieve data), POST (to create new data), PUT/PATCH (to update existing data), and DELETE (to delete existing data). You may also need to define parameters with specific values that may be passed into a controller method when handling an incoming request. How do I work with databases in Laravel API? Database management is an essential part of working with Laravel API. The Eloquent ORM in Laravel makes it easy to access and manipulate data stored in the database. To use Eloquent, you need to define your database schema using migrations. After defining the database structure, you can use Eloquent's active record implementation to interact with the database without having to write any SQL statements yourself. You can also write raw SQL queries using Laravel's Query Builder or DB facade class if needed. Read the full article
1 note
·
View note
Photo

Introduction
Writing GraphQL Test Cases in Laravel is a bit challenging. Here we will explain how to write the test cases for laravel with graphQL. Writing the test cases for our application is a great way to develop the software with efficiency. There are so many ways to write the test cases like tdd, bdd, ddd develop the software. Before we move further, you must be familiar with the graphql mutation, queries, type, endpoint, schemas. We are using the graphql rebing package here.
Why Do We Write Test Cases?
Writing the test cases for our application is a good practice when we are building a large scale application. I have covered all the scenarios like adding the new user to check validation, expected outputs, user responses, and identify any potential errors or application difficulties.
It avoids unwanted errors and bugs in the application during its creation.
To double check that all functionality code meets quality standards before the installment.
Configure The Write Test Cases
Laravel supports the testing with in-built phpunit.xml files. These files will set up a system to run the test cases. These files are located at the laravel project root directory.
In the phpunit.xml file so we create the one new env like .env.testing file in this file connection in another database for testing purposes. Now at this stage we are all set to write the test cases.
We can use the RefreshDatabase trait inside the class for every time to remove the records from the database and create the new records.
We are migrating the table using the php artisan migrate –env=testing, so in the testing database all tables are migrated.
Original Source : Steps To Write An Effective GraphQL Test Cases in Laravel?
0 notes
Text
Laravel 9 Livewire Form Submit Tutorial
This article's lesson on Laravel 9's Work with Livewire form submission idea will be covered. Information regarding submitting a livewire form in Laravel 9 is classified in this article. This idea of submitting a form will be examined from scratch. This article will be of great assistance to you if you're looking for information on how to submit a Livewire form using Laravel 9. We'll create a form with a few inputs, such as Name, Email, and Body, submit it, and save the form's data to the database.
Laravel Installation
To create a Laravel project, use Terminal and enter the following line. composer create-project laravel/laravel myblog It will build a project folder inside of your local system called "myblog." Laravel's development server can be launched here. php artisan serve URL: http://127.0.0.1:8000 assuming your system already has Laravel installed.
Create Database & Connect
Either the Manual tool in PhpMyAdmin or a mysql command can be used to create a database. CREATE DATABASE laravel_app; Open the .env file from the application root to establish a connection with the database. Find DB_ and update your information. DB_CONNECTION=mysql DB_HOST=127.0.0.1 DB_PORT=3306 DB_DATABASE=laravel_app DB_USERNAME=root DB_PASSWORD=root
Create Model & Migration
Enter project's terminal address. Let's use a single command to construct the model and migration. Model construction and migration php artisan make:model Contact -m The command above will produce two files: - Contact.php is a model file located in the /app/Models folder. - /database/migrations folder contains a migration file with the name 2022_08_13_04051_create contacts table.php. Write the following line of code in the migration file. Read the full article
#createformwithlaravel9livewire#installlivewiretolaravel9#laravel9livewireexample.#laravel9livewiretutorial#Laravel9WorkWithLivewireFormSubmitTutorial.laravel9livewireformsubmitexample
0 notes
Text
Jwt Secret Key Laravel
Jwt Secret Key Laravel Free
Jwt Secret Key Laravel Download
Secret Key Indonesia
Secret Key Rotom
Throughout this tutorial, we’ll be learning how to authenticate REST APIs using JWT in the latest Laravel 8 version. You will learn how to create a REST API using Laravel 8 with JWT authentication.
Laravel 6 Rest API using JWT Authentication. JWT authentication provides a secure way to transmit data between the client and server using Laravel APIs. In this post, we will look at how we can create a JWT authentication for a Laravel based API. API’s provide a fluent interface to communicate with the different type of services. Step 5 — Generating a JWT Secret Key. After configuring JWT authentication in our Laravel 8 app. We’ll need to generate a JWT secret key in this step. Head over to your terminal and run the following command to generate the JWT secret key: $.
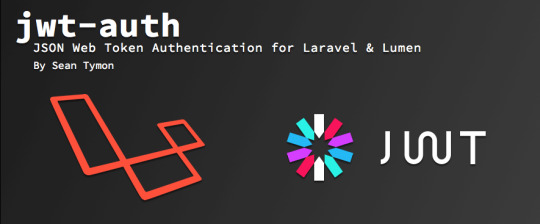
We’ll see how to set up JWT authentication in Laravel 8 and implement a secured REST API using the tymon/jwt-auth package.
Laravel 8 JWT Authentication Tutorial by Example
In this tutorial, we’ll see step by step to implement a REST API with PHP and Laravel 8 with authentication via JWT tokens.
Step 1 — Creating a Laravel 8 Application
Let’s start our tutorial by creating a Laravel 8 application using Composer — the dependency management tool for PHP developers.
Head over to a new command-line interface and run the following command:
Step 2 — Configuring a MySQL Database
After creating your Laravel 8 application using Composer, let’s configure a MySQL database in our second step.
Open the .env file located in the root of your Laravel 8′ application. Next, add the following database configuration information:
Step 3 — Installing jwt-laravel
Now that we have a Laravel 8 application with a MySQL database configured, let’s start implementing JWT authentication by installing the jwt-auth package.
Head back to your terminal and run the following command from the root of your project’s folder:
Step 4 — Setting up JWT Authentication in Laravel 8
At this step, we have a Laravel 8 application with MySQL configured. We also installed the jwt-auth library in the previous step. Now, let’s set up JWT authentication in our application.
Head to the config/app.php file and add JWT providers and aliases as follows:
Next, head back to your terminal and run the following command:
Step 5 — Generating a JWT Secret Key
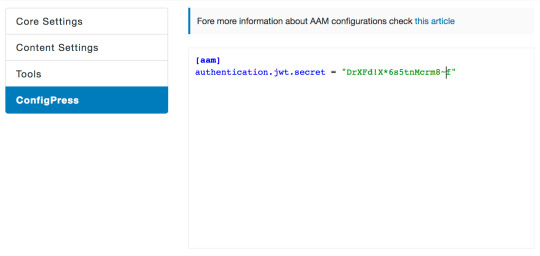
After configuring JWT authentication in our Laravel 8 app. We’ll need to generate a JWT secret key in this step.
Head over to your terminal and run the following command to generate the JWT secret key:
Next, open the vendor/tymon/src/Commands/JWTGenerateCommand.php and update it as follows:
Step 6 — Implementing JWT Authentication in Laravel 8 User Model
After configuring JWT in Laravel 8. In this step, we’ll implement it in the User model.
Open the App/User.php file, and update it as follows:
Step 7 — Implementing the REST API Controller for JWT Authentication
Let’s now implement a Laravel 8 controller for handling JWT authentication in our REST API application.
Head back to your terminal and run the following command to generate a controller:
Next, open the app/http/controllers/JwtAuthController.php file, and add the following methods:
Step 7 — Add Laravel 8 REST API Routes
Now that we have implemented JWT authentication in our Laravel 8 User model. In this step, we’ll proceed to create our REST API routes.
Open the routes/api.php file, and update it as follows:
Step 9 — Serving your Laravel 8 REST API Authentication App
After implementing JWT authentication in our Laravel 8 REST API application, let’s run our local development server using the following command:
Conclusion
Throughout this tutorial, we’ve seen step by step how to implement JWT authentication to secure and protect your REST API endpoints created with PHP and Laravel 8.
This post was originally posted on https://shabang.dev/laravel-8-rest-api-authentication-with-jwt-tutorial-by-example/
Throughout this tutorial, we’ll be learning how to authenticate REST APIs using JWT in the latest Laravel 8 version. You will learn how to create a REST API using Laravel 8 with JWT authentication.
We’ll see how to set up JWT authentication in Laravel 8 and implement a secured REST API using the tymon/jwt-auth package.
Laravel 8 JWT Authentication Tutorial by Example
In this tutorial, we’ll see step by step to implement a REST API with PHP and Laravel 8 with authentication via JWT tokens.
Step 1 — Creating a Laravel 8 Application
Let’s start our tutorial by creating a Laravel 8 application using Composer — the dependency management tool for PHP developers.
Head over to a new command-line interface and run the following command:
Step 2 — Configuring a MySQL Database
After creating your Laravel 8 application using Composer, let’s configure a MySQL database in our second step.
Open the .env file located in the root of your Laravel 8′ application. Next, add the following database configuration information:
Step 3 — Installing jwt-laravel
Now that we have a Laravel 8 application with a MySQL database configured, let’s start implementing JWT authentication by installing the jwt-auth package.
Head back to your terminal and run the following command from the root of your project’s folder:
Step 4 — Setting up JWT Authentication in Laravel 8
At this step, we have a Laravel 8 application with MySQL configured. We also installed the jwt-auth library in the previous step. Now, let’s set up JWT authentication in our application.
Head to the config/app.php file and add JWT providers and aliases as follows:
Next, head back to your terminal and run the following command:
Jwt Secret Key Laravel Free
Step 5 — Generating a JWT Secret Key
After configuring JWT authentication in our Laravel 8 app. We’ll need to generate a JWT secret key in this step.
Head over to your terminal and run the following command to generate the JWT secret key:
Next, open the vendor/tymon/src/Commands/JWTGenerateCommand.php and update it as follows:
Step 6 — Implementing JWT Authentication in Laravel 8 User Model
After configuring JWT in Laravel 8. In this step, we’ll implement it in the User model.
Open the App/User.php file, and update it as follows:
Step 7 — Implementing the REST API Controller for JWT Authentication
Let’s now implement a Laravel 8 controller for handling JWT authentication in our REST API application.
Head back to your terminal and run the following command to generate a controller:
Next, open the app/http/controllers/JwtAuthController.php file, and add the following methods:
Step 7 — Add Laravel 8 REST API Routes
Now that we have implemented JWT authentication in our Laravel 8 User model. In this step, we’ll proceed to create our REST API routes.
Open the routes/api.php file, and update it as follows:
Jwt Secret Key Laravel Download
Step 9 — Serving your Laravel 8 REST API Authentication App
After implementing JWT authentication in our Laravel 8 REST API application, let’s run our local development server using the following command:
Secret Key Indonesia
Conclusion
Secret Key Rotom
Throughout this tutorial, we’ve seen step by step how to implement JWT authentication to secure and protect your REST API endpoints created with PHP and Laravel 8.
This post was originally posted on https://shabang.dev/laravel-8-rest-api-authentication-with-jwt-tutorial-by-example/
0 notes
Text
Bhojon Nulled Script 3.0

Bhojon Nulled Script – The Ultimate Restaurant Management Solution If you're searching for a seamless, high-performance restaurant management system without spending a fortune, look no further than the Bhojon Nulled Script. Designed to simplify and elevate your restaurant operations, Bhojon delivers the perfect combination of user-friendly features, sleek UI, and top-tier functionality—all available for free through our platform. Why Choose Bhojon Nulled Script? The Bhojon Nulled Script is a complete digital restaurant management package that automates your day-to-day activities while offering a professional web presence. Whether you’re managing a local diner or a chain of restaurants, Bhojon gives you the tools you need to control operations efficiently, streamline orders, manage staff, and track sales effortlessly—all under one intuitive interface. Detailed Product Description Developed with the modern restaurateur in mind, Bhojon is packed with a range of robust features to ensure full control over your restaurant’s ecosystem. It includes everything from point-of-sale (POS) capabilities and inventory management to food ordering systems and multi-branch handling. And now, with the Bhojon Nulled Script, you can enjoy these premium features without paying premium prices. The script includes both frontend and backend modules, ensuring customers and staff can interact with the system efficiently. The responsive design ensures flawless performance on desktops, tablets, and smartphones, keeping your business connected at all times. Technical Specifications Language: PHP (Laravel Framework) Database: MySQL Compatibility: Cross-browser and mobile-responsive Modules: POS, Online Order, Inventory, Reporting, Admin Dashboard Multi-branch Support: Yes Features and Benefits POS System: Easy-to-use point-of-sale functionality for quick and accurate transactions. Multi-language Support: Serve customers in their preferred language with built-in localization options. Delivery & Dine-in Modules: Manage takeaway, delivery, and dine-in orders effortlessly. Comprehensive Reporting: Gain valuable insights into sales, customer behavior, and staff performance. Inventory Management: Keep track of stock levels and avoid shortages with smart inventory tools. Staff Role Management: Define roles and responsibilities clearly within the system. Use Cases The Bhojon Nulled Script is ideal for: Independent Restaurants Food Chains & Franchises Cafés & Coffee Shops Cloud Kitchens Food Trucks How to Install and Use Bhojon Nulled Script Download the Bhojon from our secure website. Unzip the package and upload the contents to your web server. Create a MySQL database and import the provided SQL file. Update the database credentials in the .env file. Run the installation script by visiting your domain in a browser. Log in to your admin dashboard and configure your restaurant settings. In just a few steps, you’ll have a fully operational restaurant management system at your fingertips. FAQs Is the Bhojon Nulled Script safe to use? Yes. Our version of the Bhojon Nulled Script is clean, tested, and regularly updated to ensure stability and security. Can I use Bhojon for multiple restaurants? Absolutely. Bhojon supports multi-branch functionality, allowing you to manage multiple restaurant locations from a single dashboard. Is technical support included? As this is a nulled script, official support is not included. However, we provide comprehensive documentation and community forums for assistance. Do I need coding skills to use it? No. Bhojon is designed for ease of use, with an intuitive interface and detailed setup instructions that require no programming knowledge. Download Bhojon Nulled Script Now Don't let budget constraints limit your restaurant's potential. Download the Bhojon today and experience the power of premium restaurant management tools—completely free of cost. Explore more powerful tools like the All in One SEO Pack Pro to further boost your website’s performance and visibility.
For a full-featured WordPress theme designed for multipurpose use, check out kallyas NULLED—a flexible, visually stunning theme perfect for business websites.
0 notes
Text

How To Get Started With Laravel? — A Beginner’s Guide By Sohojware
Laravel, a free, open-source PHP web framework, has become popular worldwide for web developers. Laravel streamlines development by providing a robust foundation for building modern web applications. This comprehensive guide from Sohojware, a leading US-based software development company, will equip you with the essential knowledge to embark on your Laravel development journey.
Why Choose Laravel?
There are many reasons why Laravel stands out in the world of web frameworks. Here are a few key benefits:
Elegant MVC Architecture: Laravel enforces the Model-View-Controller (MVC) design pattern, promoting clean code separation and maintainability. This structure makes your code easier to understand, test, and scale as your application grows.
Object-Oriented Approach: Built on top of PHP’s object-oriented capabilities, Laravel fosters code reusability and promotes a well-organized development workflow.
Built-in Features: Laravel comes packed with a plethora of pre-built functionalities, including authentication, authorization, routing, caching, database management, and more. This saves you time and effort by eliminating the need to develop these features from scratch.
Artisan CLI Tool: Laravel’s powerful command-line interface (CLI) tool, Artisan, simplifies common development tasks like generating models, migrations, controllers, and other boilerplate code. This speeds up development significantly.
Active Community and Ecosystem: Laravel boasts a large and active community of developers who contribute to its continuous improvement. This ensures access to extensive documentation, tutorials, and readily available packages for various functionalities.
Getting Started with Laravel
Now that you’re convinced about the advantages of Laravel, let’s delve into the steps to get you started:
1. Prerequisites:
Before diving into Laravel development, ensure you have the following tools installed on your system:
PHP (version 7.4 or later): Download and install the latest version of PHP from the official website (https://www.php.net/downloads/).
Composer: Composer is a dependency manager for PHP. Follow the installation instructions on the Composer website (https://getcomposer.org/).
2. Install Laravel:
There are two primary methods for installing Laravel:
Method 1: Using Composer:
Open your terminal and navigate to your desired project directory. Then, run the following command:
Bash

Replace “your-project-name” with your preferred application name. This command will create a new Laravel project directory with all its dependencies installed.
Method 2: Using Laravel Installer:
If you don’t have Composer installed, you can download the Laravel installer from the official website ([invalid URL removed]). Once downloaded, execute the following command in your terminal:
Bash

3. Set Up Database:
Laravel utilizes a database to store application data. You can choose from various database management systems like MySQL, PostgreSQL, or SQLite. Configure your database credentials in the .env file located at the root of your project directory.
4. Start the Development Server:
Laravel provides a built-in development server to run your application locally. Navigate to your project directory in the terminal and execute the following command to start the server:
Bash

This will typically launch your application at http://localhost:8000 in your web browser.
5. Explore the Project Structure:
Laravel adheres to a well-defined directory structure, making locating and managing different application components easy. Take some time to familiarize yourself with the key directories like app, config, public, resources, and routes, each serving specific functionalities.
Building Your First Laravel Application
Now that you have a basic Laravel setup, let’s create a simple application to demonstrate its functionalities. We’ll build a basic blog system where users can view a list of posts.
1. Create a Model:
A model represents the data structure of your application. To create a model for posts, run the following Artisan command in your terminal:
Bash
This command generates a Post.php file within the app directory. Modify this file to define the attributes associated with a post, such as title, content, and author.
2. Create a Migration:
A migration is a version control system for your database. It allows you to define changes to your database schema and easily roll them back if necessary. To create a migration for the Post model, run the following Artisan command:
Bash
This will generate a new migration file within the database/migrations directory. Open the file and add the necessary columns to the up method. For example:
PhP
3. Run the Migration:
To apply the changes defined in the migration to your database, run the following command:
Bash
This will create the posts table in your database.
4. Create a Controller:
A controller handles user requests and interacts with your models. To create a controller for managing posts, run the following Artisan command:
Bash

This will generate a PostController.php file within the app/Http/Controllers directory. Inside the controller, define methods to handle different actions, such as displaying a list of posts, creating a new post, and editing or deleting existing posts.
5. Define Routes:
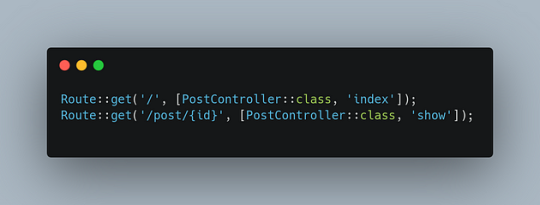
Routes map URLs to specific controller actions. To define routes for your blog application, open the routes/web.php file and add the following code:
Php

This route will map the root URL (http://localhost:8000) to the index method of the PostController class.
6. Create a View:
Views are responsible for rendering HTML content. To create a view for displaying the list of posts, run the following Artisan command:
Bash
This will generate a posts/index.blade.php file within the resources/views directory. Inside the view, write the HTML code to display the list of posts.
7. Complete the Controller:
In the index method of the PostController, retrieve the list of posts from the database using the Post model and pass it to the view:
PhP

8. Test Your Application:
Access http://localhost:8000 in your web browser to see the list of posts displayed on the page.
Conclusion
This guide has provided you with a solid foundation for getting started with Laravel. By following these steps and exploring the framework’s rich features, you can efficiently build robust and scalable web applications. Remember, practice is key to mastering Laravel. Start experimenting with different features and building your own projects to enhance your skills.
FAQs
What is the difference between Laravel and CodeIgniter?
Laravel and CodeIgniter are both popular PHP frameworks, but they have distinct approaches and features. Laravel emphasizes convention over configuration and provides a more expressive syntax, while CodeIgniter offers a more lightweight and flexible structure. The choice between the two often depends on project requirements and developer preferences.
Can I use Laravel for large-scale applications?
Absolutely! Laravel is designed to handle complex and high-traffic applications. Its robust architecture, scalability features, and active community support make it a suitable choice for enterprise-level projects.
How does Laravel compare to other popular frameworks like Symfony and Yii?
Laravel, Symfony, and Yii are all powerful PHP frameworks with their own strengths and weaknesses. Laravel is known for its ease of use and expressive syntax, Symfony offers a more modular and customizable approach, and Yii emphasizes performance and efficiency. The best framework for your project depends on your specific needs and preferences.
Does Sohojware offer Laravel development services?
Yes, Sohojware provides professional Laravel development services. Our team of experienced developers can help you build custom Laravel applications tailored to your business requirements.
How can I learn Laravel more effectively?
The best way to learn Laravel is through hands-on practice and experimentation. Start by following tutorials and building small projects. As you gain confidence, gradually tackle more complex applications. Additionally, consider joining online communities and forums where you can connect with other Laravel developers and seek help when needed.
1 note
·
View note
Text
Client Manager Pro (PHP Scripts)
Summary
This application based on new Latest Laravel 5.5 Framework. Client Manager Pro is complete Customer Relationship Management software that is a great fit for almost any company, freelancer or many other uses. With its clean and modern design, Client Manager Pro can help you look more professional to your customers and help improve business performance at the same time. It is designed latest security and code standards and it is ready for high availability web application.
Documentation
You can view the documentation by following this link: Documentation
Live Demo
You can view a demo installation by following this link: Live Demo
Admin
Username: [email protected]
Password: demo
Employee
Username: [email protected]
Password: demo
Features
Secured CRM system
Employee management
Client management
Reference management
Job management
Payment management
Every kind of report generate
Create Note
Upload and dodnload file
Make custom invoice
Bill manager
Individual and group SMS
Print, PDF download
Advance setting option
Multi-Author System
Multilabel role manager
Admin Employee Profile Page
Secure Authentication
Easy Installation Using Installation Wizard
Detailed Documentation
Manage employee and client easily
Dynamically changeable every Information
Using Latest Laravel 5.5
Cross-Browser Compatible (IE6+, FF, Safari and more).
Fully object oriented and commented PHP and JavaScript code.
Auto pagination.
Custom job-details profiles.
User can upload their own avatar.
Each can be disabled in the admin panel if you do not need them to be displayed.
Login expiration – Control default time before a job-details is logged out.
“Remember Me” feature on login.
Supports password hashing/ encryption.
Customizable password validation.
User can retrieve password by specifying either username or email.
Completely customizable “Password Reset Email”.
Supports both (HTML and Text) Messages.
Security Considerations.
Forgotten password screen.
Forgotten password reset.
Email based password recovery.
Email activation – Avoid false sign up!
All old password reset codes are removed from database for security purposes.
Complete documentation provided.
Live demo view.
Full Support.
PHP >= 7.0.0
OpenSSL PHP Extension
PDO PHP Extension
Mbstring PHP Extension
Tokenizer PHP Extension
XML PHP Extension
Installation
Follow all the steps carefully…
Download the file which you have purchased
Upload zip file in your server
Extract the zip file that you uploaded
Create a database using hosting database wizard
Go to purchased folder and find .env file
APP_URL=your_domain_name DB_DATABASE=your_database_name DB_USERNAME=your_username DB_PASSWORD=your_user_password
Then go to config/app.php ffile, find line number 55
Change urlto your domain name
Then go to line number 68 set your time zone
If you using any folder location in your hosting to install this script, then you need some extra change in root .htaccess file on line number 3. You can open to edit this file on Notepad or Notepad++. Here will be adding your folder name as below..
<IfModule mod_rewrite.c> RewriteEngine on RewriteBase /your_folder_name/ RewriteCond %{REQUEST_FILENAME} !-f RewriteCond %{REQUEST_FILENAME} !-d RewriteRule ^(.*)$ index.php/$1 [L] </IfModule>
Support
Please feel free to contact us with any questions you may have via the contact form on our author profile page
or email us: [email protected]
Updates Note
VERSION 1.2.0 – 03 APRIL, 2018
Initial release
Credits
Laravel
Ajax
jQuery
Bootstrap
AdminLTE Template
from CodeCanyon new items https://ift.tt/2H7XRjk via IFTTT https://goo.gl/zxKHwc
0 notes
Text
oClassifieds - PHP and Laravel Geo Classified ads cms
New Post has been published on https://intramate.com/php-scripts/oclassifieds-php-and-laravel-geo-classified-ads-cms/
oClassifieds - PHP and Laravel Geo Classified ads cms
LIVE PREVIEWGet it now for only $49
oClassified is a PHP and laravel geo-location based classified cms. Almost zero coding required to build a most advance classified website. oClassified is a complete classifieds application solution with feature-rich classified scripts.
Our classified is SEO Friendly and ready to meet the search engine with highly data crawlable. We followed the latest standard in every section. The search engine will be welcome it’s URL, breadcrumb, images and other data immediately.
oClassified is ready to monetize with its built-in Adsense implementation module. You can add any of other monetized system.
We catching visitors location to show them ads within their country, this the power of Geo-Location Ads CMS.
This is completely responsive and RTL ready. Add any language with its multilingual module.
There are four types of ads and counting, every type of ads containing special data that need with that type, such as General Ads, Jobs, Car and Vehicles, Auction.
Get this php classified scripts and get professional support with regular free updates.
Artificial Intelligence PHP Classified script will give you the ultimate experience, it will ads for exactly what you are looking for, The URL segment will be changed by based on your query and it will be dynamic, breadcrumbs and SEO param will print based on search and ad single page. oClassified PHP classified script become extremely powerful after update v.2.0
Need Support?
Support for all our products is conducted through our Support Forum , where you can submit your product related questions, bug-findings, etc.
Demo Credential
https://demo.themeqx.com/oclassified/public Email: [email protected] Password: 123456
Features
Laravel Version: 6
Geo Location Support
Artifical Intelligence Powered URL, Bredcrumbs, SEO
CMS Pages
Social Login (Facebook + Google Plus + Twitter)
Native Comment Module
Facebook Comment Module
RTL Integrated
Premium Ads
Regular Ads
Multiple Ads type and specific ads details page (General Ads, Jobs, Car, and Vehicles, Auction)
Intelligent Classified script
SEO Friendly
Sharing Module
Intelligent Categorised Ads
YouTube and Vimeo video as feature video
mage count or video at ad preview box
Related ads in ad details
SEO and Micro data ready for better search engine rank
Report from frontend for guest or registered user, if they think ad is offensive
Unlimited categories and brand create, edit, delete
Location (Create, edit, delete)
Switching file storage between Local and Cloud without loosing previous resource (Images, files)
Page management (You can create any page, such as About Us, Terms and condition, etc)
Quick Sign In
Clean and Modern Design
Multilingual Support
PayPal Integrated
Stripe Integrated
Google Adsense supported
Bootstrap 3 CSS Frameworks
SEO optimized
Translation Support (You need to add language from admin panel))
Social Share for Ads
Well commented code.
Fully Responsive
Amazon S3
Anti-fraud payment algorithm, made by us
Free update and support
and much more.
Before purchase, Please make sure your server meets the following requirements
PHP >= 7.2.0
BCMath PHP Extension
Ctype PHP Extension
OpenSSL PHP Extension
PDO PHP Extension
Mbstring PHP Extension
Tokenizer PHP Extension
XML PHP Extension
Ctype PHP Extension
JSON PHP Extension
Fileinfo Extension
Any advice?
Please tell us about your thought to be improve it by clicking here
Change Log
Version 2.0.1 [02 October, 2019]
Exit Demo mode by .env settings Disabled debugbar by default in production mode
Version 2.0 [30 September, 2019]
* Updated Laravel to v.6.0 * Updated stripe SDK to v.7.2 * Improved Performance 2X * Removed datatables from the core * Removed Form generate from the core, used HTML form instead * Fixed few database column issues * Database query optimized * Deleted some unused variable * Fixed few currency issues * Fixed few database column issues * Fixed Multiple price show issue
Version 1.5.2 [12 August, 2018]
1. Security Update 2. Fixed know bugs
Version 1.5.1 [20 May, 2018]
1. Fixed: Search Location Datatable issue 2. Fixed: Adblock Issue 3. Fixed: Google Map Issue 4. Fixed: Some known bugs 5. Improved: Performance
Version 1.5 [6 April 2018]
1. Fixed : Datatable issue in cities and state in the dashboard
Version 1.4 [19 February 18]
1. Fixed : Database issue
Version 1.3 [23 January 18]
1. Fixed : Contact form issue 2. Improved GEO Location based ad search 3. Fixed : Known Bug 4. Performance Improved
Version 1.2 [25 November 17]
1. Few known bug fixed
Version 1.1 [15 October 2017]
Fixed a security issue by preventing XSS attack Geo Location improved
Version 1.0 [25 September 2017]
1. Initial Release
LIVE PREVIEWGet it now for only $49
0 notes
Text
LaraClassified v5.4 – Geo 分类广告CMS破解版
系统简介
系统亮点
在线演示
功能介绍
系统需求
更新日志
安装方法
更新方法
目录
系统简介
LaraClassified是一个强大的广告分类CMS,具有开源和可调整的应用程序具有完全响应式设计。 基于Laravel和Bootstrap(HTML5&CSS3)构建,功能相对很完善。
在这里用户可以按照地区发布广告内容(也可以是二手、租赁等内容),访客可根据地理位置自动展示周边内容。
系统亮点
使用更多人喜欢的响应式设计
连接外部服务,如:贝宝,亚马逊SES,Mailgun,Mandrill,Sparkpost,Twilio,Nexmo,Facebook(OAuth),谷歌(Adsense,OAuth,地图)等等,为网站盈利助力。
易于使用,为您节省时间。 只需2分钟即可安装。
多语言,模板分离等。
在线演示
前台:http://laraclassified.bedigit.com
Email: [email protected]
密码: 123456
后台:http://laraclassified.bedigit.com/admin
Email: [email protected]
密码: 123456
功能介绍
Custom Fields (Create your own Classified Ads, Auto Deals, Real Estate, Directory Listings or Jobs Portal websites)
Clean and Modern Design
Fully Responsive (also in Admin panel)
Built with PHP/MySQL & HTML5/CSS3
Frameworks: Laravel, Bootstrap, jQuery, VueJS
Geo location supported (with Maxmind free or pro database)
Multi Countries (Switch to Multi Countries or Single Country)
Multi Currencies
Multilingual Support (English, French, Spanish and Arabic Included)
Support for RTL direction
Unlimited Colors
Homepage Customization (Change and Order the Home Sections from the Admin panel)
PayPal Integrated
Google Adsense integrated
Google Maps integrated
Twilio and Nexmo APIs integration
Facebook comment integrated
ReCaptcha integrated
Turn ON/OFF Ads activation Option
Turn ON/OFF User account activation Option
Allow guests to post an ad without being logged
Email Notifications (Using local SMTP or Amazon SES, Mailgun, Mandrill, or Sparkpost API)
SMS Notifications (Using Twilio or Nexmo API)
Resend Mail or SMS verification feature (Get more users with valid email or phone number)
CMS for Static pages (Create pages like: About Us, FAQ, Terms & Privacy, etc.)
Contact page (Contact form & Google maps)
Website Sitemap page
Google XML Sitemap
RSS feeds generator
List of countries page (If activated, SEO supported)
SEO optimized
Website backup (Admin panel module)
Blacklist (Admin panel module)
Plans/Packages (for Premium Ads)
Front End Listing Submission
Social Networks Login (Facebook, Google)
Protecting the users phone number against crawler
Well commented code.
Ready to use
Free Updates
and much more..
系统需求
PHP 7.1.3 或更新 (需要一些 PHP扩展,具体见安装第一步的扩展环境检查.)
OpenSSL PHP 扩展
PDO PHP 扩展
Mbstring PHP 扩展
Tokenizer PHP 扩展
XML PHP 扩展
GD 或 Imagick
PHP Fileinfo 扩展
PHP Zip Archive
Rewrite 模块 (Apache 或 Nginx)
更新日志
Version 5.4 Aug 9, 2018
Security vulnerability fixed (mentioned in the Laravel v5.6.30 Security Release).
Version 5.3 Jul 31, 2018
Bugs fixes.
Version 5.2 Jul 30, 2018
Admin panel: User Roles and Permissions (ACL) system added.
Minor improvements.
Bugs fixes.
Version 5.1 Jun 9, 2018
INFORMATION
By upgrading your website to the v5.1 you have to activate all the purchased plugins (add-ons) from the Admin panel → Plugins.
More backup features added (to prevent data losing).
Ability to disable the ads report pages indexation on the search engines added.
Ability to hide all the footer links added.
Cities columns option added in the homepage location area management.
Admin panel: Languages creation/edition forms improved.
Allow admin to force UTF-8 encoding for Dates (to prevent the Dashboard Charts display issue).
Create a new token if the post or user (email/phone number) is marked as unverified.
Minor improvements.
Bugs fixes.
Version 5.0 May 12, 2018
Admin panel: Bulk Items Deletion added.
HTTPS support fixed.
Minor improvements.
Version 4.9 May 4, 2018
INFORMATION
From the v4.9 the script requires PHP 7.1.3 or higher.
If your current version is v4.3 or lower, you have to read the v4.4 caution before starting the upgrade.
You have to clear your browser cache after the upgrade.
Support for Laravel 5.6.* (with several Laravel Security Fixes).
Russian, Thai, Portuguese, Turkish and Georgian languages files added.
Synchronization of missing lines of languages files during the website upgrade, or through the Admin.
More options for the homepage categories area management.
New Messages Auto-Checking (with configurable timer) feature added.
Enable/Disable the "Cities extended searches" from the Admin panel.
The Admin panel list pages is now responsive.
Cookie Consent Alert (to comply for EU law). Can be enabled from the Admin panel.
Display the County (or State) when selecting cities (in cities suggestion).
Click on the drag and drop zone to select pictures from your computer.
Optimization of Laravel Eloquent Queries with Eager Loading (to accept large databases).
The system no longer removes the 'included languages' files on languages deletion.
Replace the 'Packages' step by 'Payment' in ads posting process.
All categories (including 'job-*' categories types) now accept images uploading for ads.
Number Of Views/Items Counter: Shorten long numbers to K/M/B.
HTML Sitemap page improved.
The /public/uploads/ directory contents has been moved in the /storage/app/public/ directory.
XML Sitemaps fixed (Bug appeared by activating the multi-countries feature).
Links in the ads pictures slider (appeared on Firefox 59.*)
Bug fixes.
Minor improvements.
安装方法
因程序基于Laravel框架,程序需要指定二级目录作为运行目录,安装时候需要单独设置一下:
���置网站目录和程序运行目录
网站目录例如/home/reishi/topide.com
运行目录则设置成/home/reishi/topide.com/public/
如有不懂请咨询主机服务商或好友或度娘。
然后建立数据库,解压缩文件,将文件上传。
运行http://yoursite.com/install 按照提示检查系统环境,
检测通过输入数据库信息和产品授权码,在Purchase Code里输入
nulled-by-reishi 然后按照提示一步一步进行安装。
更新方法
注意:更新之前请备份数据库、语言包以及更改过的CSS文件。
解压缩文件, 除了/.env文件和/ public / uploads 目录之外的全部内容,上传覆盖。
然后访问你的网站或打开http://yoursite.com/upgrade网址进行更新。
如果更新过程中出现了401错误时,请到网站后台检查,此时更新应该就是完成了。
from 站长源码 https://zz04.net/2839.html
0 notes
Text
Reviewer - Business & Product Review System Listing (Ratings and Charts)
Reviewer ADS Listing software will allow you to create own Business & Product Review website in a few clicks. Its efficiently developed PHP Classifieds script .Its Very easy to use and SEO friendly software. Build your own php classified script website in just few clicks. simple and vital PHP + MySQL based script with all inbuilt options provides one step solution. It is professionally developed in PHP based Laravel framework with MySQL backend. Visitor Frontend: ✍ Fully Responsive Design. ✍ Unique Template. ✍ Informative Menu’s. ✍ Login & Registration System. ✍ Quick Links. ✍ Easy to use contact form. ✍ Category & Sub-Category. ✍ 100% User friendly. ✍ SEO Friendly URL. ✍ Related Ads Section. ✍ Lastest Ads Section. ✍ Featured Ads Facility. ✍ Easy to Share On Social Media. ✍ Report Facility. ✍ A to Z Description. ✍ One Click Publisher Details. ✍ Publisher Profile. ✍ Total ADS View Counter. ✍ Multiple Image Facility. USER Panel: ✍ Interactive USER Dashboard. ✍ Easy to post new ads. ✍ Review Facility. ✍ Featured Ads Facility. ✍ Online Payment Facility. ✍ Photo Upload. ✍ Multiple Currency. ✍ Favourites Ads Section. ✍ Own Post Gallery. ✍ Management of Own Profile. ✍ Email Notification. ✍ Bookmark / Whitelist Facility. Admin Panel: ✍ 100% Secure & Dynamic. ✍ Gorgeous Dashboard. ✍ Full Management of ADS Category. ✍ Full Management of ADS Sub-Category. ✍ Location / Area Management. ✍ Multiple Currency Setup. ✍ Full ADS / POST Management. ✍ Easy to Search ADS. ✍ SET Featured ADS. ✍ ADS Management. ✍ Total View Management. ✍ SITE Slider Management. ✍ SITE LOGO Management. ✍ About Us Page Management. ✍ FAQ Management. ✍ Website TITLE Management. ✍ TOP & Buttom MSG Management. ✍ Address Managemnt. ✍ Contact Information Management. ✍ Social Link’s Management. ✍ Header & Footer Image Management. Payment Method Support: ✓ Automated Bitcoin. ✓ Automated Stripe. ✓ Automated PayPal. ✓ Automated Perfect Money. Additional Features: ➙ Page Builder. ➙ Contact MSG. ➙ Background Management. ➙ Template Color Switcher. ➙ Footer Widget. ➙ FeedBack MSG. ➙ Subscription Management. Installation Guideline Step1: Upload Files.zip to your host and unzip. Step2: Create mySQL Database and upload SQL.sql (From Database Folder). Step3: Goto File Manager and Copy Paste Database Information at ../core/.env File. Step4: Now Run your Website. Step5: Admin panel path: http://YourSiteName.com/admin Step6: Admin Username: admin || Admin Password: admin Step7: System is fully dynamic so you able to change anythings from admin panel. NOTE: If you still unable to install then pls mail us, we will install it for FREE Support Facility: Please send us your product presale query, after sales developer support request, customization project and any other queries to our dedicated support: [email protected]
0 notes